
A Step-by-Step Guide to DIY Installation of Wooden Wall Paneling in Your Home
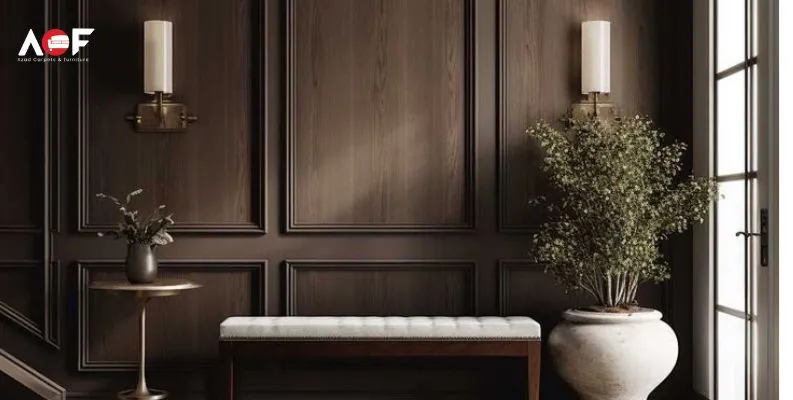
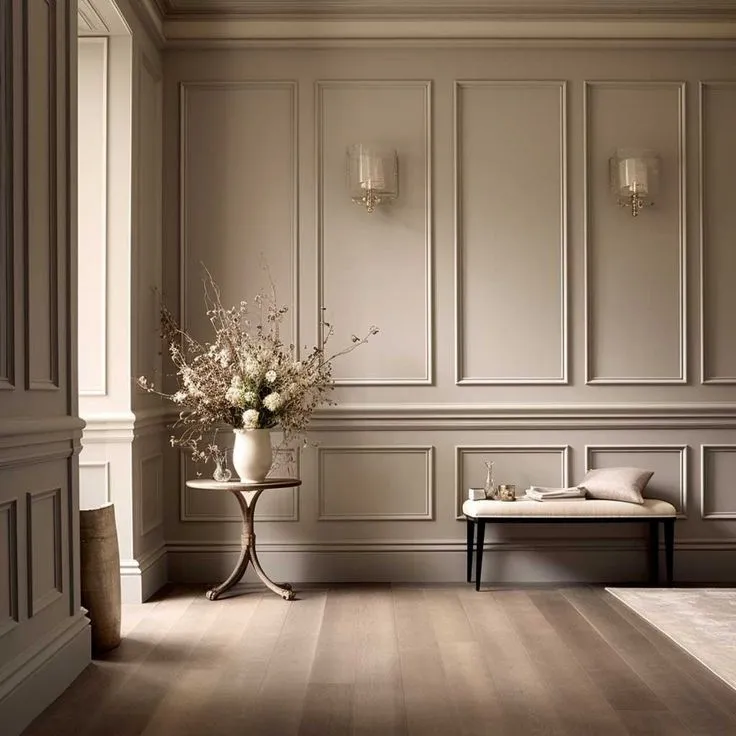
Wooden wall paneling is a classic look that can transform any room in your home. Whether you want to redo one wall or an entire room, wood paneling is a beautiful and efficient method of upgrading your home design. This step-by-step guide will cover the basics of preparation and offer valuable tips to help you achieve the best results.
Why Wooden Wall Paneling is a Good Idea
Interior wooden wall panels are beautiful and elegant but need no introduction to their adaptability in any room. They can be installed on various surfaces, including:
- Brick
- Tile
- Drywall
- Cement Board
- Lath and Plaster
- Plywood
This means that wooden paneling is perfect for today’s modern renovations regardless of the state of your walls.

Tools and Materials You’ll Need
Here’s a quick checklist to ensure a smooth installation process:
- Tape measure
- Pencil
- Spirit level
- ‘No Nails’ adhesive or construction glue
- Caulk gun
- Electric saw or jigsaw
- Cupboard and finish nails and hammer and finish nails or air nail gun.
- Screwdriver and screws
- Sandpaper or electric sander
- Rubber mallet
- Preparing for Installation
- Acclimatize the Panels
It is recommended that the wood panels be kept in the room where they will be installed after delivery.
Preparing for Installation
Acclimatize the Panels
- Wood panels should be kept in the area where they will be used after the delivery is completed.
- It is recommended to leave them in that room for over 48 hours to mesh
Prepare the Surface
- Make sure it is clean, meaning there are no dust particles. If it has a scratch or mark, it should also be rectified.
- Close any visible cracks, any chinks in the tiles, and also the plasterwork, if any, before you proceed with the job.
Step-by-Step Installation
Step-by-Step Installation
1. Plan and Measure
- To determine the wall’s size, use a tape measure.
- To get the number of panels required, calculate the wall’s width and then divide it by the width of one panel.
- Draw a blueprint to help you design where and how the panels will be placed.
2. Cutting the Panels
Depending on the tools available, you can choose one of these methods:
- Circular Saw: This is perfect for straight cuts on several panels.
- Handsaw: Most suitable for little and specific cutting, for example, near outlets.
- Sabre Saw: Suits for curves or detailed designs.
3. Glue the Panels to the Wall
For non-acoustic panels:
- Put adhesive as a zigzag on the back of the panel.
- You should use a spirit level to level the panel before sticking it to the wall by applying some pressure.
- To apply more pressure, gently tap it with a rubber mallet.
For acoustic panels:
- First, put up battens on the wall with spacing for acoustic insulation.
- Fix the panels onto the battens using screws to hold the mount in a proper position.
4. Screw Panels to the Wall
- Mark the spot for screwing the panels and the wall (or for the battens of the acoustic panels).
- Place the panel and screw it to make it have a good grip.
Special Considerations
Working Near Outlets and Fixtures
- Outline the outlets or switches on the panel onto which the box is to be fitted.
- To make the opening, use a jigsaw to cut it.
- Cut it 1/4 inch larger to make it fit perfectly.
Cutting for Windows and Doors
- It is also essential to measure the panel dimensions you want to cover.
- The panel is to be cut slightly more significantly than the frame size so that it may fit easily.
Hiding Wires
- Remove the drywall behind the TV or electrical outlet for stud walls and make wire passages through it.
- For brick walls: Trunk the wires or get a professional to put the wires into the wall.
Finishing Touches
Filling Gaps
- Apply decorators caulk in any gap or seam between panels.
- Smooth the caulked areas’ surface to get a better finish.
Painting or Staining
- Put on a primer before you paint or stain.
- To achieve the best possible result, apply two layers of the finish of your choice.
Expert Tips for Success
- Check Levels Constantly: You can use a laser or spirit level to ensure each panel is level.
- Double-Check Measurements: As a rule, it is better to measure it twice before cutting.
- Work in Sections: To complete the job correctly, one should complete one row or column before moving to the next.
- Choose Quality Adhesives: Some grab adhesives, such as “No Nails,” have a better stick-on mechanism.
Why You Should Come to Us for Your Wall Paneling Services?
For over 40 years, we have been providing quality wood products. Our wall panels offer style, quality, and value. Our range is available in several colors and designs so that you will find the ideal match for your home decorations.
Browse Our Range Today
Ready to transform your home? Check out our wooden wall panels for inspiration for your next DIY project!
FAQs: Wooden wall paneling installation.
1. Can I install wooden wall paneling on What surfaces?
Wooden panels can be installed on a variety of surfaces, including:
- Brick
- Tile
- Drywall
- Cement board
- Lath and plaster
- Plywood
Ensure the surface is clean, dry, and in good condition before you begin.
2. How do I prepare the wall for installation?
- Dust and grease must be removed from the wall by cleaning it thoroughly.
- Be sure to repair cracks, loose tiles, and damaged plaster.
- The smooth surface of the sand is an uneven area.
3. I need to acclimatize the wood panels, do I?
Yes, do acclimate your panels to the temperature and humidity of the room for a minimum of 48 hours before installation. This will prevent warping or expansion once it is installed.
4. Which adhesive is most likely to be recommended to use on wooden wall panels?
High-strength construction adhesives like No More Nails or grab adhesives can be used. The adhesive may be combined with nails or screws for extra hold.
5. Can I install panels around electrical outlets or fixtures?
Yes, follow these steps:
- Trace around the outline of the outlet on the panel.
- When cutting the opening, use a jigsaw and cut the opening 1/4 inch shy of that dimension for a snug fit.
- Take off the faceplate of the panel and reattach the outlet faceplate.
6. How can I hide wires hidden behind wall panels?
For stud walls: Make holes at the top and bottom of the wall for wire threading.
For brick walls: Dig them down, chisel channels for wires, cover them with trunking, then replaster the wall.
7. Do I need to install battens for all installations?
You’ll need battens if you’re installing acoustic panels or need extra support. If not, the panels can be glued or screwed directly onto the wall.
8. What are the best tools for cutting wooden panels?
- Circular saw: This is used to make straight cuts into several panels at once.
- Handsaw: Detailed or minor cuts, such as around fixtures.
- Sabre saw: For curves or precision work.
9. What to do with gaps between panels?
- Fill gaps or seams with decorator caulk.
- After the caulk, sand the area to make it look seamless with the rest of the paint job.
10. Can I fit wooden panels in bathrooms or kitchens?
Yes, but you should choose moisture-resistant wood panels and use waterproof adhesive in areas with high humidity.
11. I also don’t know what paint or finish to use.
- Paint or stain, but first apply a wood primer.
- For kitchens and bathrooms, use durable, moisture-resistant paint.
12. How can I make sure that I put panels straight?
Each panel can be aligned with a spirit level or laser. During installation, check the alignment frequently.
13. Can you install wooden panels on curved walls?
Flexible wood panels or custom panels can create curved surfaces. Ensure the adhesive provides enough hold to maintain the shape.
14. Can wooden wall panels be taken down quickly later?
Removing panels is easy but may leave minor damage on the wall. Loosen the panels that have been glued together with a heat gun or adhesive remover; patch holes for screws or nails.
15. Can I install wooden panels myself, or would it be better to hire a professional?
Fortunately, if you have the right tools and preparation, most wooden panels can be installed by yourself. However, you should hire a professional for complex installations, such as acoustic panels or a curved wall.
Comments are closed